So you want to weave a hatband

You will need to gather a few items other than the #11 Miyoki Seed Beads. 

Dimensions 

The boards at the base is 28 inches long and the slider board is 18 inches.The end boards (the ones with the springs) are 3 1/2 inches tall. I secured these end boards to the slider and base with three 2 1/2 long wood screws and wood glue. The have to be secure as the warp threads have quite a bit of tension on them. 

The Loom

I made this loom myself from #1 pine (no knots) 1 inch x 4 inch lumber. I have a cut off saw, a drill press and an assortmant of drill bits.  I was able to purchase the screws, nuts, bolts,washers and springs at a "box home store." 

Holes, Nuts &Bolts

The holes drilled in the slider and the base line up and are 3/8 inch diameter. I also countersunk the holes on the base to accomodate a washer to keep the bolt from ripping through the hole. I think the bolts are 5 /16 th inch with washer on the cap and washer and wing nut on the threaded end. You can vary this, or couse, but it has to be strong because the slider must not move once the bolts are tightened.

The Loom 


End and underside

You can see the detail here for the location of the 2 1/2 inch
screws and three smaller screws which are used to tie off the
warp threads.

Warp thread Spring

A spring is attached with two wood screws to the uprights of the slider end piece and the base. The purpose is to space the rows.

Attaching the Warp

You wind and tie securely one end of the #10 Fire Line (tm) pulling it thru the spring insuring a proper spacing for each row of beads. 

Loom Detail


Pull Tight

I am right handed and wear a glove when I am installing
 warp thread.
This has to be pulled tight and it could cut your hand. Don't be afraid, it won't break. I never broke a Fire Line warp thread. 

Warp Thread Details

As you work your way across the loom you wrap the thread around the "screw poles" and insure you have the same space for each row. You should end up with 21 spaces or how many you decide. The choice is yours of course. When you reach the last row, wrap the warp as many times as you think will secure it and tie it off. CRITICAL It must not slip.

21 open rows

My hatbands have 21 rows
I have made smaller,

but can get more
information and scenes on 21
Always count the spaces twice

Mobirise

Image Description

Final Tightenin - Warp Threads

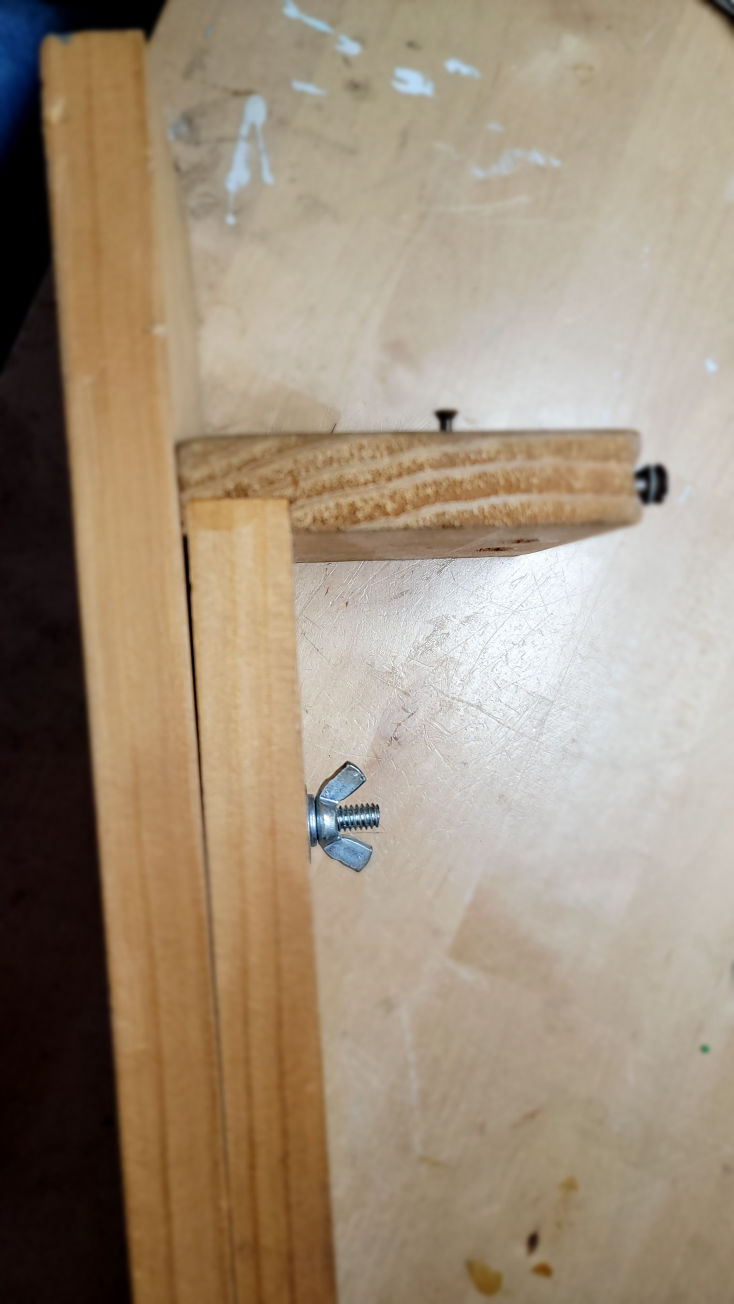
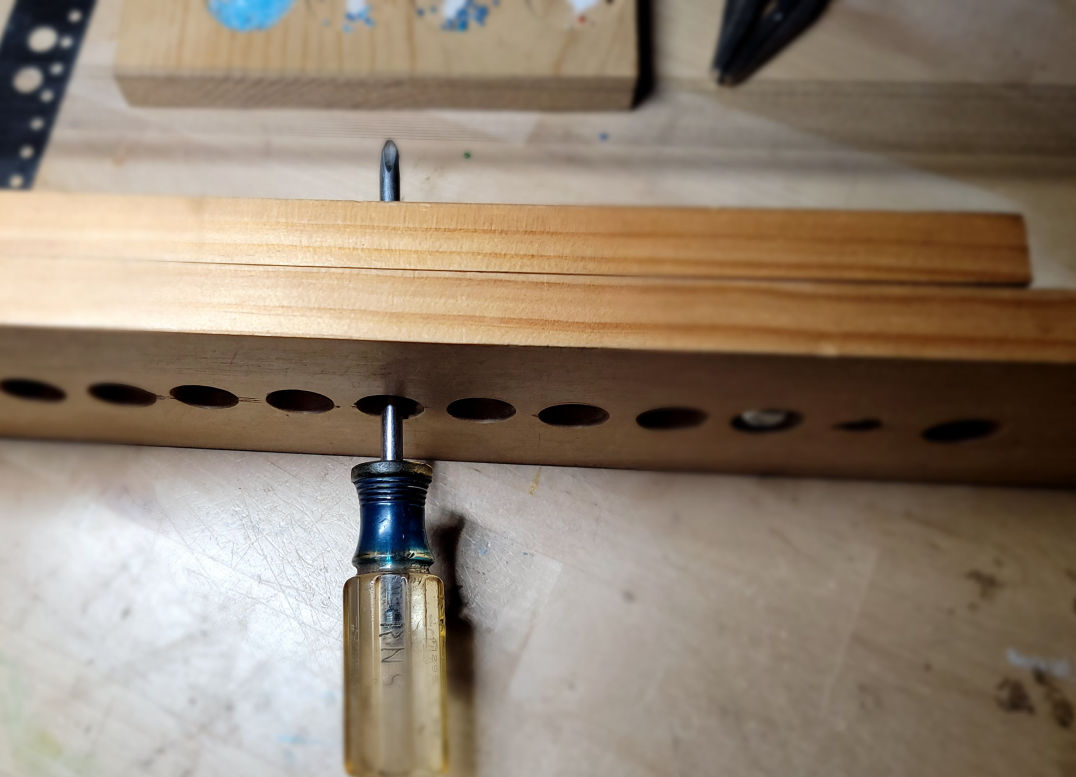
The warp thread should be really tight. Tight enough so they "sing" when strummed like a guitar. What I do is insert a screw driver or similiar strong bar into one of the open holes that run thru the base and slider. The wing nuts, at this point, are tight, but not to tight that the screw drive, when turned so as to move the slider and tighten the threads. Often takes two people to do this since after the threads are tight, you have to tighten the bolts by holding the wing nuts secure and tighten the bolt cap with with a socket wrench. Seriously, you don't want the slider to slip, EVER. 

I believe you can purchase a loom on line which will work just as good as my homemade one. I just didn't want to spend the $100 plus for one. I figured "I built my own house," I should be able to make one of these.   LOL  

Parts 

Springs, Needles, Thread

Springs

Sorry the package is damaged
Looks like  5/16 x 3 x 028 inch

Needles

I have tried a lot of them, but now use these "big eye" needles. You have to put 21 beads at a time on them, so you need a long needle. These are actually a wire, split down the length, making it easy to thread.

FireLine

OK  This stuff is expensive $15 US a spool, BUT it will not break and it will not stretch. I have left half finished projects on the loom for months and they did not stretch. Just get this line if you are serious. You will spend 30 hours or more on a standard hatband. You don't need to waste your precious time. 

Beads

I use #11 Miyuki Delica Glass Seed Beads

Miyuki Delica Beads

These Delica beads are NOT ROUND.
They are cylindrical in shape
They come in clear tubes and are sold by the gram. Most hobby stores have them and they can be had from many vendors on line. Try to get the beads which have the color infused so if it got wet, it would not run.

A Work in Progress

Following your pattern
you start picking up beads one at a time, 21 per column. 16 column to an inch, 6000 beads in an 18 inch hat band...you get the picture. You picked them up one at a time with a needle.. 
PATIENCE

My Palet

I made this out of a piece of clear pine. And drilled small, round wells with a continuious rim  "Forstner bit" The wells keep the beads in their place, unless I drop something on it  LOL 
Similiar bead trays can be purchased at the hobby shop and on line reasonably priced, so you don't have to make your own.

Mobirise

Computer screen view of pattern developed from a JPG image. 

EasyBeadPatterns.com

Without this free tool, I might never have made my first hat band.
It has worked from me with Windows 7 and 10 for years. It has most of the colors of the #11 Delica beads. You can import a photo or just "free hand" your own pattern. In essance, you make
your project here before you put it on your loom. It doesn't take as long to do it....I think. The actual length of each column is 16 beads. So if you make a pattern, ignore the length results given by easy beads. 

Remember, if you are making a hatband or bracelet, your image import won't be so precise as the one shown due to the small size.

Mobirise

Pattern

After you design your band on the EasyBeadsPattern designer, you will need to print it out so you can follow. You can use and index card or equivilant as a guide to move from one column to the next. I copy the design in sections (usually two or three) as it is easier to follow. Remember 16 #11 Delica beads = 1 inch. If you are making a hat band, measure your hat. Don't forget to take into account the tie tabs in your total measurement. 

Mobirise

Tie Tabs Part One      

Some hobby stores will sell you a bag of scrap leather which you can use to make your tie tabs. You will also need material to lace your band together. This will allow it to be adjustable. I use spring loaded "watchamacallits" to keep the lace from untying


Tie Tabs Part Two 

When you have completed the last column of beads by going thru the last 4 rows with your needle to secure the project. You will cut the Warp threads away from the loom. I use a single edge razor blade. #10 FireLine is tough. Cut it close to the screws which were used to secure the line. 
I then cut out a peice of leather that is long enough and wide enough that when folded it will secure the threads. I use "Gorilla Glue Clear" on the inside of the tab (cover all inside areas without overdoing it) I then clamp them between two blocks of wood to insure even pressure. Let set overnite. Two part expoxy works great too. 

Next step is to punch holes in the leather large enough for the tie material you have selected. You don't have to have a leather hammer. I had one from previous projects. The punch comes from the hobby shop. 

Have you decided to purchase a finished hatband yet?    LOL 

I am the type of person who sees something and I think "I can do that!"  Occassionally I can. Often I am motivated by cost. A custom one of a kind hat band can cost $600 with a 6 month wait list. If I worked on one for 8 hours a day, I could finish one in 3 maybe 4 days. Sometimes I take 3 maybe 4 MONTHS or longer. That is why the warp threads have to be tight. You might find it is cheaper to order a custom band than round up the materials and tools you need to do them.
BUT if you think you want to make them for fun or profit, it is rewarding and
 not near as expensive as Bass fishing. ALL HOBBIES AND CRAFTS will cost $$ at start up. 

 I am sure I left some "beads" unturned so you are welcome to email me here
info    (@sign)  vicsgems.com
and NO I don't sell custom hatbands, YET.  But I will tell you how I make them.
Cheers

Vic Vreeland 
282 McDonald LN W
Cedar Creek, TX - 78612

AI Website Creator